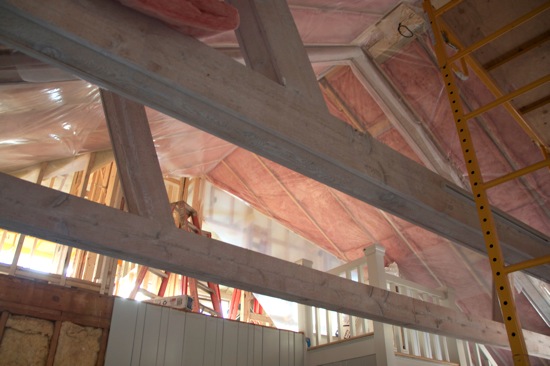
Although the living room was ripped apart during the renovation, very little changed aesthetically speaking. This was the room that I thought we were going to live in during most of the renovation, and then we found out that the roof on this half of the house was sagging and would have to be shored up at some point. Since we weren’t planning on ripping up the house again anytime soon, we opted to take care of while everything was ripped up.
You might recall that the living room walls and ceiling were covered in the oddest heavily textured swoopy stuff that was a dust magnet and drove me nuts. When the construction guys started taking down the ceiling they discovered that it was actually joint compound. We think that a previous owner just bought buckets of the stuff and stuck it on for a plaster look. The compound was on so thickly that they couldn’t cut pieces much bigger than 3-by-2 feet because they were so heavy. Anyway, once the framework was exposed, they jacked up the 2×6 joists (which apparently is what they used in 1938) and sistered them with 2x8s (it’s OK to be impressed by my vast knowledge of construction terms). Then we had them do about 4 inches of spray foam insulation and fill the rest in with rolled insulation, as we did in the rest of the house.

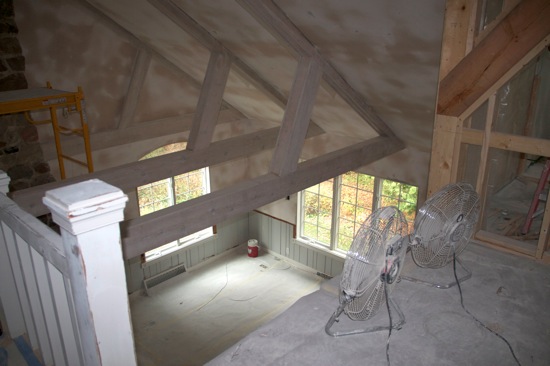
Here’s a view from upstairs looking into the living room the day that the drywall texture was applied (it’s still wet so that’s why it looks all wonky in the picture). The wainscoting on the lower level is original, and in we had them replace the drywall to get rid of the horrible texture on the walls as well. This picture shows where they removed the railing during the construction and I have to say, it was really freaky to not have that there.

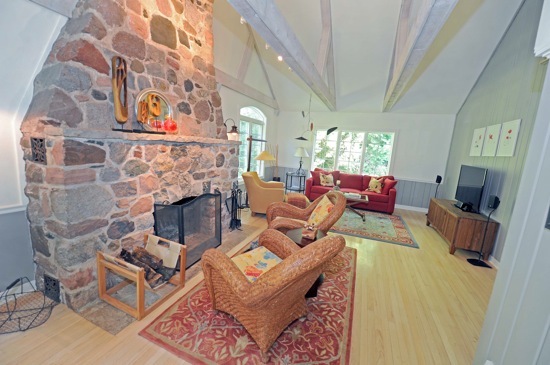
And here it is now.

Here’s a view looking the other direction so you can get a feel for the whole room. You can see the horrific wall texture (which I’m lucky enough to experience every day in the three rooms in the house that remain untouched) in this picture taken before the renovation.

You can also see the very first thing we changed in the house in these pictures: the sconces that flank the fireplace. When we bought the house they were some kind of shiny gold, beveled glass 1980s wonder and I couldn’t stand them. We bought those copper outdoor lights from Smith and Hawken way before anyone (in Wisconsin at least) heard of putting outdoor lights inside. The Calder-esque mobile that is hanging from the beam in both photos came with the house (one of many, many things left behind by the previous owner during a chaotic moving day). Even though it doesn’t have a lot in common with the room, I love it. And, I fit under it. Mr. Much More Patient does not.
As much as I once loved the color scheme in here, I don’t much anymore. I’d love to change it all over to a navy, off white, pop of color thing, but I’ll just add that to the list. I’ve given some thought to having the beams (which we found out really are structural) faux painted to be a different color (they do have a bit of a pink cast to them sometimes), but they don’t bother me that much and I bet that would be pretty expensive.
I sort of wimped out in choosing colors in this room, but I felt like the ceiling and walls should be the same color since they sort of flow into each other, and I knew I wanted something I wouldn’t easily get sick of because with the super tall ceilings, this is definitely a professional paint job. Plus, I knew at some point I wanted to change from the red/mustard color scheme and I didn’t want to limit myself with the existing wall colors.
There’s not a lot to tell about this room, but here are the paint colors:
- Walls, ceiling, trim: Benjamin Moore Mascarpone
- Wainscotting, wall paneling: Benjamin Moore Gray Husky


One Response
Take photos of your magnificent gardens and have the photos enlarged — many websites do it & frame them for you.
You got this.