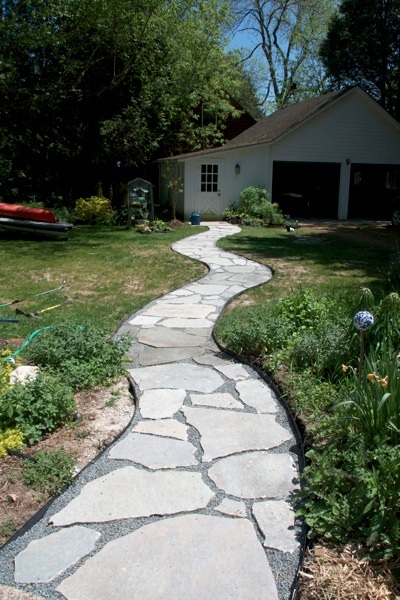
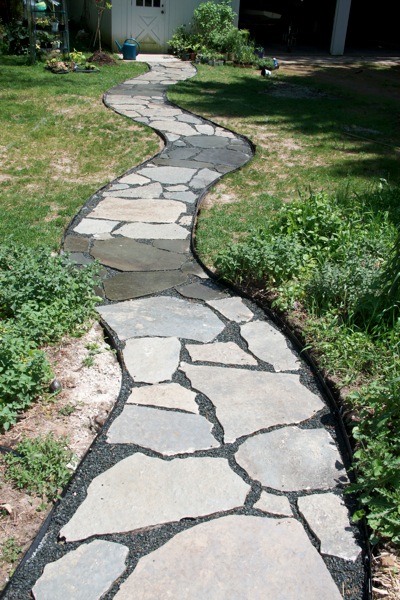
The path is finished! And trust me, that declaration is entirely worthy of the exclamation point.
I actually finished it two weekends ago but sometimes I like to let these things percolate before I write about them on the blog. If you recall, after the last update on the path the path had been dug, edging put in and the road base put in and tamped. All that really left was for the stones to be laid. My original intention was to level the stones individually with sand but I found using more road base worked better.
I’ve laid small flagstone paths before so I knew what to avoid, which is the same thing you want to avoid when laying any stone: long runs of joints. To me, creating patterns that are intentionally random are much harder than set patterns. I just made sure to limit the number of times I had two stones going across the path. Most of the stones seemed to be sized to fit two across so if I did a larger one on one side, I’d switch and put the next larger one on the other side. I laid four stones that were the entire width of the path (or very close, requiring just a small accent stone next to them) which I think really helped break up the pattern.
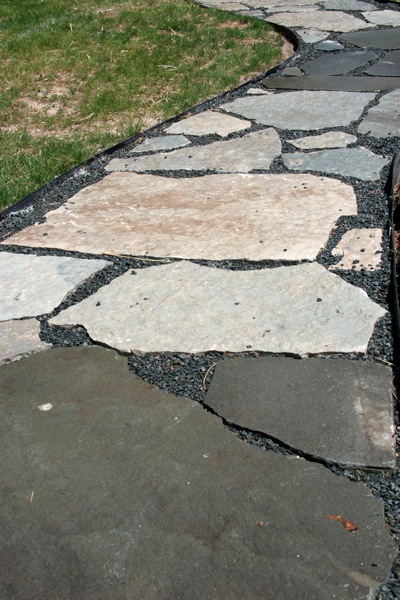
The hardest part of laying the stones was dealing with the bluestone. It was all cut into mostly rectangles and of course that wouldn’t work with the more informal flagstone, so I chipped away the edges on every piece of bluestone. This was difficult because bluestone likes to break into layers and in several cases when I was trying to just break off a corner, the entire piece would shatter into layers. It also shattered into shards that were downright dangerous and a pain to clean up.
Here’s the path as it usually looks. The difference between the flagstone and the bluestone is barely distinguishable.

Here’s what it looks like wet. I sort of like the idea that it feels like we almost have two different paths depending on the weather.


As it turned out, I had plenty of flagstone leftover, enough that I could have done the entire path in flagstone if I had wanted to, but I liked the idea of incorporating the bluestone from my grandmother’s house and even though I wasn’t sure it would all work, I became sort of infatuated with the idea of a subtly striped path. I didn’t measure anything out but I did roughly pace off sections so I would know roughly where to put the bluestone.
After all the stones were set, I let them sit a day or two and then went back to check for any rocking or unlevelness and once I fixed that, I put the decorative gravel in. And I’m thrilled with the results. They say that hardscaping is just as important as plantings in your yard and garden and we’ve never had much of. And I think once the garden beds that will flank a portion of the path are installed, the overall look will be quite nice.
The entire project took about 25 hours (I think). Mr. Much More Patient helped with the digging for one afternoon (the worst part of the project by far) and helped place the three biggest stones but I did the rest myself. I’m convinced, hardscaping is worth the time, pain and expense but I will be really happy when all these hardscaping projects are over.


5 Responses
Looks great! Our front path is almost done; they sure take a while don't they? I love the idea that you have stone from your grandmother. That makes your path unique to you and your garden. And I am a big proponent of hardscaping; it really sets a garden off. So many folks just do bark paths and not much else. Your deck, window boxes, the path — all of these make such an individual space.
Thanks, everyone. Threeacres: that's exactly why I went with the gravel this time around. After eight years of trying to grow every ground cover imaginable between rocks (sagina subulata ended up working the best but even that was a major challenge), I realized I was spending a lot of money replacing holes in the ground cover every summer. I think groundcovers are beautiful and look so nice but they really aren't best for well-traveled areas. Ours just couldn't handle the winter walking on and shoveling.
Looks great! I wish we had decided to put gravel in our flagstone path instead of attempting to grown groundcover. Of course the reason we added the path was that we couldn't easily mow along the edging we installed around the rock wall flowerbed.
It will look great when the flowerbeds filled with plants soften the look.
That is gorgeous! You should be so proud of what you've done!
Impressive! And back breaking work! It looks really nice.